On a cold fall evening I returned from the grocery with some 2 cuts of loin of lamb, bone-in. I love lamb, this particular cut is inexpensive, fatty and good for roasting and stews. This particular chilly evening, I wanted something easy, so I searched the cabinets and the freezer and came up with some basic ingredients for lamb stew. Once again my chopping up vegetables and freezing them in advance made my job easy.
one - 16oz can of crushed tomatoes
2 1/4 cups of (frozen) green beans
one chopped (frozen) green bell pepper
Medium yellow onion (frozen), diced
two carrots cut into half-moons
Salt and pepper to taste
Two lamb loins, bone-in (cut off the fat if you want, I leave it on for flavor)
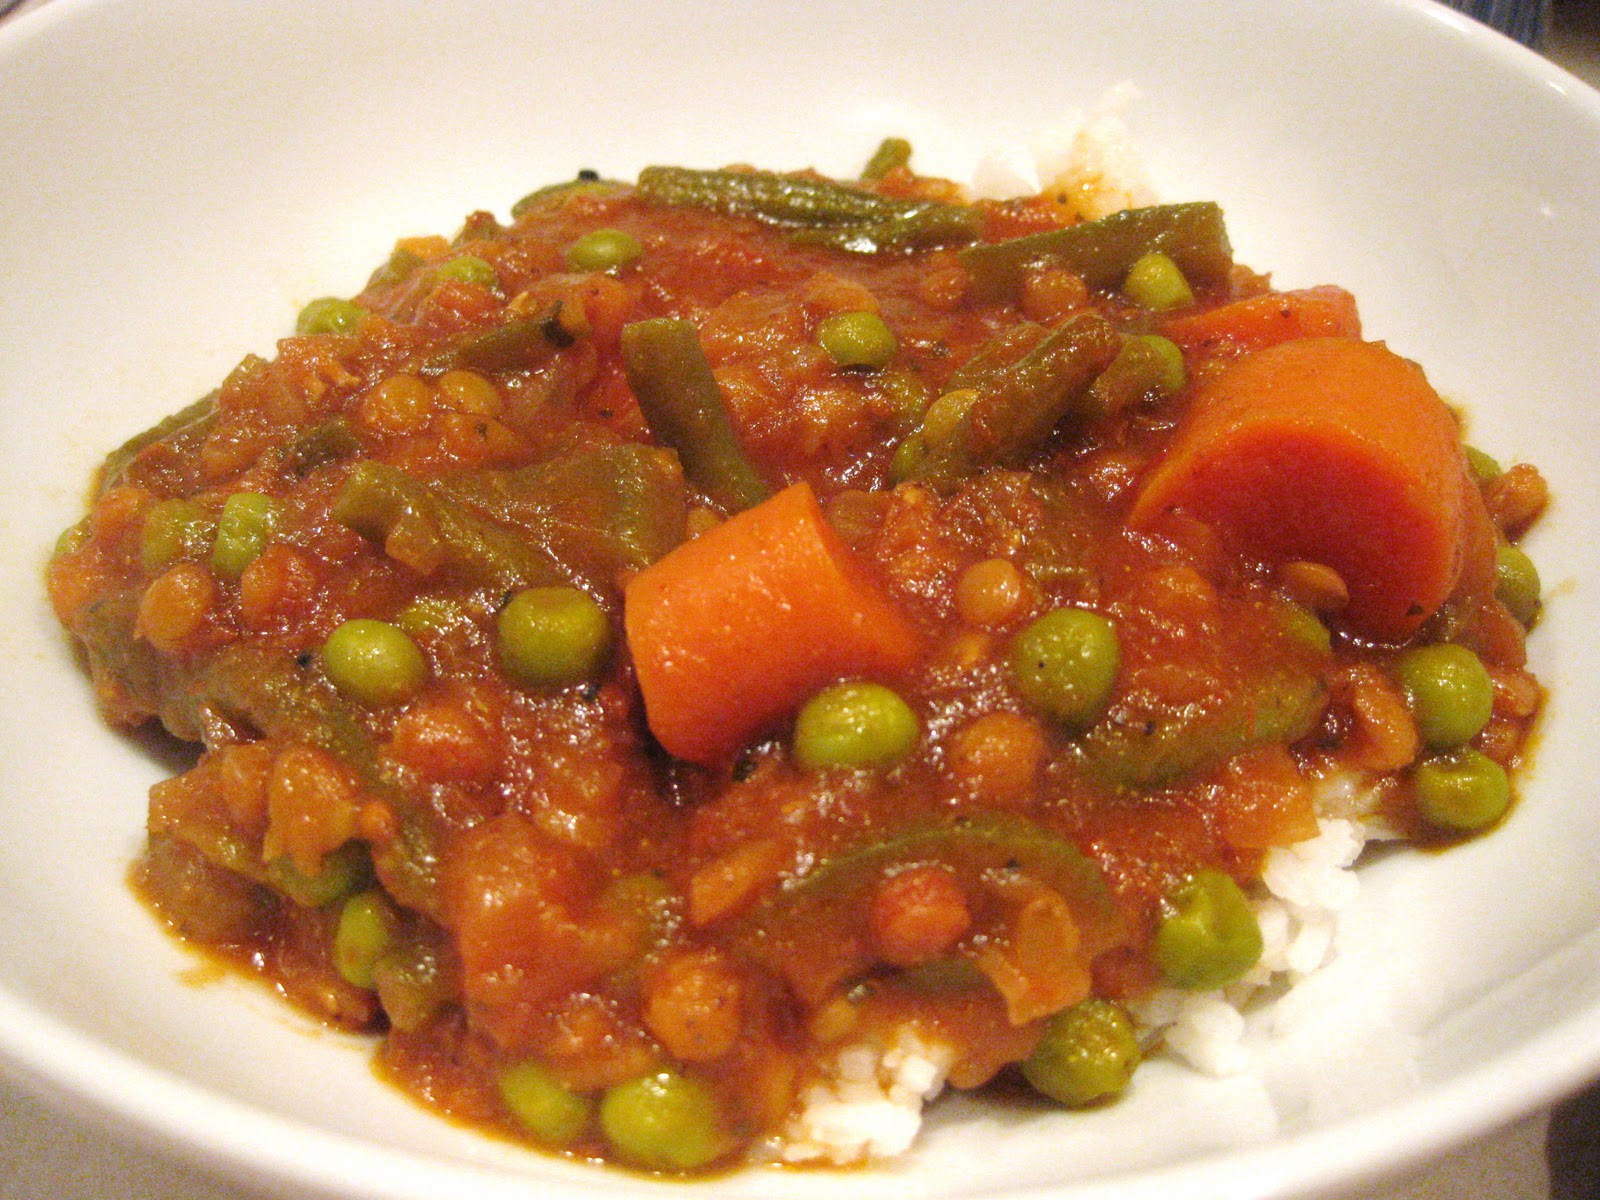
I served the stew with wheat bread and, of course, when the meal was complete the bones went into the freezer for a future meat-based broth. However, the bones were not alone in the leftover category. There was still delicious tomato-based stew left, now infused with lamb flavoring. I saved this of course, and made a second meal of it the next night:
I simply added peas and served the leftover stew over jasmine rice . . . but it did not end there, as there was still more stew left over. This time the leftovers went into the freezer. They came out of the freezer recently and I simply heated the stew on the stove and in my All-Clad skillet I pan-seared some lamb chops in red pepper olive oil, seasoned with lava salt and fresh ground pepper.
After I removed the chops (cooked to a medium-rare temperature, a few minutes on each side) I kept the skillet on the burner and added steamed, diced red potatoes and a little more of my red pepper olive oil - to pick up the lamb flavoring left in the pan.
Finally, I then served the last of the stew over the potatoes aside the lamb chops. And once again the bones of the chops were saved for my next batch of meat broth.
One of my favorite places to buy fresh meat is at the Meat House in Arlington Heights. I was amazed at all they had to offer, not just at the counter, where I picked up two very thick, bone-in veal chops, but also in the back freezer. Anything from bison ribs, venison, elk, game birds, boar, and pork belly - which may not be so exotic a find as alligator per-say, but not a common find at the local grocer. So on a whim, along with the fact it was $6.17 for almost 2lbs, I decided to buy it. It sat in my freezer for about three weeks when I decided it was time to try out a recipe for roasted pork belly I had been eying in my copy of River Cottage Meat Book .
It was football Sunday, therefore another great opportunity to hole myself up in the kitchen. We had invited two of our friends over for football, well one of them came over for football; my friend Anya was lured with the promise of roasted pork belly. She is a foodie like myself and we very much enjoy going out to dinner as much as staying in and eating home-cooked meals - wine is generally involved as well, another like we have in common, one that goes so well together.
Root Mashed Potatoes
My first preparation was that of the root-mashed potatoes, a recipe that originally came out of Inside America's Test Kitchen. I have adapted the recipe to my own dietary needs and I am continually changing, as suggested in the book, the variety of root vegetables I add.
1. I filled my Le Creuset 5 1/2qt. Dutch Oven with 2" of water (I did not have chicken stock on hand, normally I would use that instead of water). I put in the pot:
One large Sweet Potato cut into 2" cubes
Two medium Gold Potatoes cut into quarters
Three small-medium Parsnips, cut length-wise and then into half-moon shapes
2. I allowed the mix to steam (about 45-55 min on low heat - the brilliance of Le Creuset ware is that it holds heat so well that you can simmer on the lowest flame setting on a gas stove). You want the vegetables to be tender enough that you can easily pierce with a fork.
3. I let the cooked vegetables sit on the stove with the lid on to keep hot until I was ready to mash - that moment came when the pork was ready rest, and the other side dish was about finished. When that time came, I dumped the mix into a bowl and mashed away with a potato masher. I did not drain out the liquid at the bottom of the pot; instead of using cream, milk, soy, almond milk etc. I decided to use the mild vegetable broth from the steaming, there was probably about a 1/2cp of liquid left. I do sometimes use almond milk, which is great by the way if you are lactose and soy intolerant. Almond milk is a much better substitute for a cream substitute - unlike soy, almond milk does not curdle when it comes in contact with acidic ingredients like onions. I find that the Almond Breeze brand is light in flavor and has a nice creamy texture; I recommend this brand over other brands which I have found to have a bitter almond extract taste to them.
4. Once mashed, I mixed in fresh ground pepper, salt and fresh thyme to taste. Another add-in that is quite delicious is bacon (two thick slices from the butcher is all you need) as a garnish sprinkled on top.
To accompany the pork belly I made a Cranberry-Apple Sauce
You will need:
4 Granny Smith Apples (one apple per person), peeled and cored, sliced into 1/4" half-moons
1/2 cp fresh cranberries
Zest from one orange
Juice from half a lemon
Cinnamon
1-2Tb of super fine sugar
1. In my cast iron skillet, I mixed all the above minus the cranberries, and placed on medium heat until mixture was simmering, stirring regularly so not to burn the apples.
2. I then lowered the heat and let cook with occasional stirring until the apple slices were soft, but not mushy; I then stirred in the cranberries.
3. I let the cran-apple sauce lightly simmer, with occasional stirring until the apples were cooked to the point where they could be easily pierced with a fork and the cranberries were able to be mashed a bit.
This dish can be served at room temperature, but this time I simply reheated while the pork was resting.
Roasted White Asparagus
My heart was so full of glee when I came across white asparagus at the local Stop and Shop, it is a rarity there, so I jumped at the chance and bought a bunch. I wish I had bought more and froze them, but hopefully they will soon return. White asparagus are milder in flavor and delicate, compared to the green variety. The bottom of the stalks of the white asparagus, I find, do not require a fight in order to eat and digest.
My plan was simple and the result was a perfectly roasted vegetable side dish to join with the rich pork belly and and earthy root vegetable mashed potatoes.
In a shallow glass pie pan, I sprayed olive oil on the asparagus using my Misto, added salt and fresh ground pepper to taste, and chopped garlic. The asparagus roasted in the oven at350F for about 18-20min; at the half-way point I rotated the asparagus.
Pork Belly:
You will need:
Fresh thyme
Sea salt
Fresh ground pepper
Pre-heat the oven to 425F; you will want to roast the pork belly at this temperature for 30min and then lower the temperature to 350F and continue to roast for about an hour.
1. With a sharp knife (or as suggested in the River Cottage Meat Book, use a utility knife) make multiple slices into the skin of the pork. Then rub the thyme, salt and ground pepper into the "pockets" of the skin .
2. Roast for 30min at 425F and lower to 350F until the juices run clear and the crackling (pork skin) is a golden brown.
3. Let the pork rest for at least 10 minutes before slicing and serving. I kept the crackling on the pork, rather than remove it and serving it separately.
I recently went to the grocery and, as always, checked out the $1.09 rack - which is where produce that is past the point of looking good enough to pay full price end up. I came across two bushels of very ripe strawberries, I put them in my cart and went about my shopping. As soon as I got home I washed the strawberries and picked out the bad ones (of course there were some with mold that were beyond saving). I then cut off the tops and placed them in the freezer for future smoothies and pancake toppings! I made wheat pancakes and heated the strawberries separately in a small sauce pan, adding just a bit of water. No sugar was necessary because the berries were so ripe when I froze them; their natural sweetness was just enough, especially when combined with maple syrup. The berries simmered over medium-low heat with occasional stirring for about 15-20min to allow the water to evaporate and the strawberries to form into a slightly thick consistency, some juice was desired so that it absorb into the pancake. All I can say is that Eric had more than one serving, and I did as well.
There are a variety of ways to control the flavor and intensity of any broth. One way, for example, is how you spice your chicken for roasting. The spices infuse with the succulent drippings from the bird that end up at the bottom of the roasting pan, not to mention the spice-infused skin. Another way is adding vegetables; I use vegetable scraps collected over a period of time (stored in the freezer). Generally my vegetables add-ins include the following: yellow onion peels and ends from a few onions, carrots, the ends of asparagus stalk, broccoli stalk, red and green bell peppers, zucchini . . . you get the idea. These add wonderful flavors to a broth, as well as great nutrients. I personally like a hearty and rich broth, that could stand on its own.
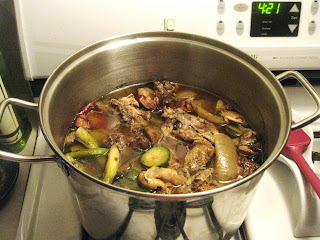
Simmering the broth (2 1/2 hrs)
However, sometimes a rich broth is not called for or necessary, sometimes a light broth that provides subtle flavor is just the right thing - I tend to use light broths when making spicy white bean chili - the spices are powerful and generally over power the broth. The intensity of the broth can simply be manipulated with how long the broth is simmered. For a strong, hearty broth I simmer the stock for almost 3hrs. For a light broth I simmer for only 2hrs. Intensity will also depend on vegetables used in the stock, for example I find broccoli stalks adds a bold flavor to broth compared to the lighter,subtle flavors of yellow squash.
When I make chicken, or any meat broth, I usually let it cool in the fridge overnight. This allows the fat to separate and congeal at the top. If there is a lot of fat, I scrape the fat off the surface of the gelatinous broth. As seen below.
Spooning the fat off the top of the chilled broth (light-yellow areas are fat).
The broth I made last week was rich and flavorful. I added locally grown, organic kale, chopped portabella mushrooms, diced onions, and chicken meat leftover from the previous night's Spicy Roasted Chicken. I added two bay leaves and let the soup simmer on the stove for one hour covered. After an hour I added slightly undercooked brown rice and simmered for another hour. The result was a delicious and hearty/healthy chicken soup.
Two nights ago I made a Roasted Italian Herb Chicken. It was quite good. I picked off leaves from my sage basil and thyme plants, diced them up fine and spread all over the chicken with olive oil. I served the chicken with white asparagus, tossed in olive oil with garlic and baked at 350F for 15min in the oven while the chicken rested. The other side was roasted potatoes and carrots which I through in with the chicken from beginning to end. The red potatoes and carrots were simply quartered and allowed to roast in the chicken juices, which allowed the the skin of the potatoes to develop a wonderful browned crust of fat, from the runoff of chicken juices (not exactly healthy, but soooo good).
A few days later I made the broth. It was made with one whole chicken and I few pieces of onion, three large cloves of garlic - so a medium flavored broth. Tonight I am going to use it to make Italian Herb Chicken Noodle Soup!
Last week Eric and I had dinner at a friend's house up in Andover. I offered to bring a whole chicken, challenging my cooking skills because they live 50 min away due to Friday night traffic. I had to figure out the best way to prepare the chicken for travel and, most importantly continuing to cook the chicken on arrival without drying out the chicken or under cooking it.
So here is how I prepared a delicious Roasted Chicken, that was tender and juicy:
1. Preheated the oven to 450F
2. I removed the chicken from the packaging and placed the insides in the freezer for stock to be made at a later date. I then patted down the chicken with paper towels (I did not wash the chicken - water splashes everywhere contaminating your sink and counters) - the paper towels also remove the slimy/wet barrier so the oil and spices better stick to and penetrate the skin during roasting.
3. I use a foil lined roasting pan, easier clean up and I can build up the sides of the pan with the foil so less moisture escapes, curving the foil slightly toward the chicken so the moisture collects and falls back into the pan - I do not cover my roasted chickens with foil during any part of the cooking process, nor do I baste the chicken - neither are necessary and basting just allows the heat from the oven to escape. Of course if you notice your chicken skin burning, this happens on occasion if I get preoccupied, then cover with foil.
4. I used my Misto to spray the olive oil on the chicken and for this particular occasion I used a variety of spices to create an Indian-style roast chicken: Ground Fenugreek Seed, Sumac Berries, Cloves, Paprika, Cumin, sea salt and fresh ground pepper.
5. I placed the chicken in the oven at 450F for about 20min, keeping my eye on the skin for any signs of burning. I crisp up the skin first at this high heat to lock in the juices. If you save this part for the end, then you may easily dry out your chicken.
6. Once the skin turned a nice yellow-brown and appeared transparent and crisp, I lowered the heat to 375F. I kept the chicken in at this temperature until it reached 160F (this took a total of 1hr 20min or so).
I will tell you that if I were to have continued to cook the chicken for another 30min it would have been done - the temperature you want when you take it out of the oven is about 175F and as it rests the chicken will continue to cook up to the final wanted temperature of 180F. However I was traveling to Andover so I took it out early so I could finish the job at my friend's home.
7. I called my friend and told her to preheat her oven - which was no problem because she was already using her oven to cook squash.
8. When I got there the oven was at 350F. So I put in the chicken and let cook for another 30min and when it came out of the oven it was allowed to rest for another 10min. During resting the chicken continues to cook up, so the final temperature of the chicken was a perfect 180F.
I think everyone enjoyed the chicken as little was left. This image leads to my next blog, which is how to get from this (the carcass) to this:
Next time The Evolution of Broth Part III - Chicken Broth
Here I am again to tell you about my Thursday night dinner and my sweet potato snack I made from the leftovers.
Thursday night I made pork chops with diced, steamed sweet potatoes and sauteed spinach.
Sweet Potatoes
Steaming sweet potatoes takes some time, 15mins about; so I start the potatoes 5min before cooking the meat and veggie
1. Dice up the potato(es) (I used one very large sweet pot. for both of us) diced into about 1" pieces
2. Steam until tender (can easily pierce it with a fork)
3. Remove from heat and keep covered until ready to serve
4. I love sweet potato so no frills are necessary for me, I spray some olive oil on them using my Misto (love my Misto) and add fresh ground pepper.
Pork Chops:
1. Removed the chops from the fridge, salted and left out for an hour before cooking in order to bring the meat closer to room temp. This allows for even cooking of the meat and the salt removes excess water from the pork which was previously frozen.
2. After an hour I wiped down the meat to remove some of the salt and excess water - I wipe down all meat with a paper towel rather than wash it for two reasons which go together - 1- the heat will kill any bacteria so there is no need (here is the 2nd reason) to contaminate your sink and counters with raw meat from the splashing often caused by running water over your meat.
3. I sprinkled the chops with a new spice I bought - Charnushka, It was a great, subtle addition to the pork chops. I also added fresh ground pepper.
4. In a large saute pan, I heated about 2Tbs of crushed red pepper olive oil (I make this routinely in small batches by just barely heating olive oil and crushed red pepper on the stove and putting it in a spice jar). I placed the chops in the very hot pan for about 3min on each side, until they were browned and cooked just medium.
5. I them let them rest under foil as I prepared the spinach. Resting is extremely important, the meat will continue to cook up during this period of 5-10min - this is why I remove meat from heat just before it is done - the outcome is very juicy, tender meat.
Spinach:
1. I quickly rinsed the pork chop pan, leaving some of the juices and tidbits of pork stuck to the pan. I reheated the pan, placed half a bag of washed spinach in the pan and added some red pepper olive oil, fresh ground pepper, dash of salt and 1/3cp of cooking sherry.
2. Once the spinach started to reduce in size, I added the second half of the spinach, tossing fairly constantly until the water from the spinach was reduced to a nice browned colored broth and the spinach a dark green
You can also add garlic in with the mix, but to be honest I do not like garlic in my spinach, although I love it in just about everything else. I also love to add sauteed mushroom/corn.
After dinner I placed the remains of the pork left on our plates - bone and fat - into the freezer, adding to my slow growing meat stock ingredients. There were still a good amount of sweet potatoes left, so I put them in the fridge for the next day.
The next day Skillet Sweet Potatoes:
1. I tossed the leftover, diced sweet potatoes in Pumpkin Seed oil, dash of salt and fresh ground pepper
2. I heated a small skillet and added the potatoes, cooking until they were just a bit crispy
I am lying in bed with all the windows open enjoying the amazing spring-like weather here in Arlington. The sounds around me are quite interesting as well. To my left window I can hear, for the first time ever, my neighbor playing some light jazz on his/her sax (Over the Rainbow and somewhat appropriate for the coming weekend festivities)- very pleasant. To my front window, in the next room, are children yelling and, well, being children on the school playground across the street. I just have to say I love Halloween, tomorrow there is a Zombie walk of 50 middle-schoolers, and I think I will have to stop by the Arlington Center and watch, maybe bring some candy with me. It is truly one of my favorite holidays, the other being Christmas because I am a visual person and I love lights on everything and sparkling things dangling of trees. The cats, Madden and Parker, are also chilling with me on the bed, completely ignoring each other.
Yesterday I went to the store and bought some essentials for the weekend. A pack of pork chops (bone in), two for tonight and two in the freezer for another night. I am starting to build up a stash of meat bones, so far I have two huge veal bones from a special dinner I cooked for Eric a few weeks ago. Next I will add the pork bones from my recent buy. Not sure if I will be satisfied with just that thou, so I will probably wait on making meat based broth until I get more bones to contribute.
While at the Stop and Shop, I perused the racks of soon-to-be tossed produced. Stop and Shop wraps up bulk veggies and fruits that are close to being expired and sells them for $1.09, no matter what it is: strawberries, peppers of all kinds, apples, squash, green beans . . . . etc. Yesterday I got a nice batch of organic mini-zucchini. I brought it home and washed them, cut them up, put the scrap ends to the side to freeze for broth, and finally divided the pieces into two batches, one to freeze the other for tonight's dinner. The zucchini is in mostly perfect condition, but needed to be tended to immediately. I only buy off the rack when I know I have enough time to cut, sort and freeze the produce or cook with it that very night. This practice that I picked up on is a great way to save money, but even more important the food is not going to the dumpster in back of the Stop and Shop at the end of the night. I often will grab veggies off this rack for making soup stocks, they may be a bit bruised but the flavor is ripe - usually at its best - and looks don't matter in stock, only the flavor and nutrients being extracted from the vegetable.
That's it for today. Tomorrow I am roasting a chicken for a dinner with friends, simple, thrifty and very tasty. I will post the recipe in my upcoming blog. I leave you with Parker and Madden goofing around in the kitchen while I am trying to cook.
My mother pointed out a few things about this photo so I will clarify 1) the stove is not on and 2) the cats are not generally allowed to use the counters and cabinets as a playground . . . however, when I saw what they were doing I had to take the picture
There is nothing more satisfying to me than making my own vegetable and poultry stock (both fish and meat stock are on my to-do-experiment list). Now, I started making chicken stock first; I think sometime way back when I lived with my grandparents after college and was making lots of bone in chicken, they liked my chicken.
Anyway, I started noticing how much waste was going in the garbage after our meal - all the bones, chicken skin, tidbits of meat clinging to the bone, not too mention the fat and juices at the bottom of the pan. I decided I did not want to waste all that good stuff anymore so I decided to make chicken broth for chicken soup - Brilliant and thrifty I thought! Well of course I did not look in a book to find out how to make broth - or at least good broth. So I winged it and came home from the grocery with celery, carrots, onion - inexpensive but you will read later that spending money on making broth is not the goal.
So I bought the stuff, cut it all up, put the veggie mix in with all the chicken bones I had been collecting in the freezer for a few weeks in a large pot, filled it to the brim with water and let it simmer with lid on for about 1 1/2 hrs. Let's see where did it all go wrong, well wrong is not the word but BLAND is . . . First off when making chicken stock put all the goodies in the pot then add water to just barely cover the ingredients - too much water will only dilute the broth and increases cooking time in order to get that perfect, rich broth. Second, a lid? What was I thinking? That keeps the water in and does not allow for proper reduction. Third, WHOLE CHICKENS are where it's at - the more the better!
So some time between leaving the grandparents and entering graduate school I started roasting whole chickens. Up until recently I was a single girl, and other than the frozen food dinners at the grocery (you know the 10 for 10 "cuisines") there are few options for singles when it comes to individual serving sizes. Then why buy a whole chicken you ask? How do you manage to eat a whole chicken without it going bad? I think this dilemma inspired me to find all possible ways to use everything I buy.
The first night, usually Sunday, I roast the chicken. It takes a total of 10min prep and about 1hr 45min cook time. I steam or saute vegetables on the stove top during the last 5-10min of chicken time. As for carbs - well I never used to bother but Eric (my fiance) likes them, so I cut up some potatoes and put them in with the chicken and that's that. So total time spent on meal one is 20min or so. So we eat the chicken and place the leftovers in the fridge for the next night. After the second night of whole chicken eating, I tear the chicken to pieces - literally, I use a big sturdy knife. Now when I first open my pack of raw, whole chicken, the inside of the chicken contains, well the insides and a neck. I put in a storage container and place it immediately in the freezer. As for the cooked meat, I tear off all chicken meat I can find off the bones and either freeze it or put it in the fridge for a meal the next night (like Mexican style chicken with rice or pesto chicken with pasta).
Next, I chop up the bones into manageable sizes (pieces will eventually have to fit into pot so usually the back bone and ribs needs to be halved). After that I put those bones in with the insides I put in the freezer earlier, along with all the skin, fat and juices left at the bottom of the pan. I ALSO include all the bones/skin left on peoples plates - this my sound gross but it's not, promise.
I cook a whole chicken about every other week, especially in the winter - because it is hearty soup season! So for every two chickens I make a broth. The best part of making chicken broth, for me is that it is never quite the same. Whatever the ingredients and spices you use to make your roasted chicken will end up in the broth. For instance, last week I made a spicy curry chicken with thick slices of onion -"discs"- laying across the bottom of the pan - onion "discs" as I call them not only add flavor but it keeps the bottom of the chicken from getting all soggy and cooking in the fat. The onions and the spices mixed with all the juices, which I saved for making the broth! The outcome being a rich, slightly spicy broth with I used to make white bean chili with chicken and an assortment of hot and mild peppers.
Remember earlier I mentioned going to the store to buy ingredients for making stock is not necessary - well here is why: Those vegetables I steam or cook in any meal always have scraps that most put in the garbage. I do not. I freeze them in a separate container. Onion skins and cut off ends, the tough asparagus stalks cut off from the bottom, garlic skins and garlic that is a little past it's prime, carrot ends . . . . you get the picture. Accidentally buy to many vegetables one week? Cut them up and freeze them for stock or for cooking with later. All these veggies add up quickly and can be added to the making of the chicken broth or for a very nice vegetable broth.
A quick and final note as I end my first blog post, wear gloves or fully wash your hands immediately after handling hot peppers - the pain is horrible if you let the oils soak into your skin. If you do happen to forget and end up with burning hands - rubbing alcohol will break down the oils and almost immediately relieve the pain.
My next posts will soon follow with recipes and photographs, as I take you through my weekly cooking and grocery routine.


